Filters
Filters are a set of rules applied to proxies before they are added to the ZennoProxyChecker database after being loaded from a source. Using filters, you can exclude proxies that are clearly unsuitable. A filter is applied to all sources simultaneously. When downloading proxies from a source, any proxies that do not meet the filter criteria are discarded and are not added to the main database.
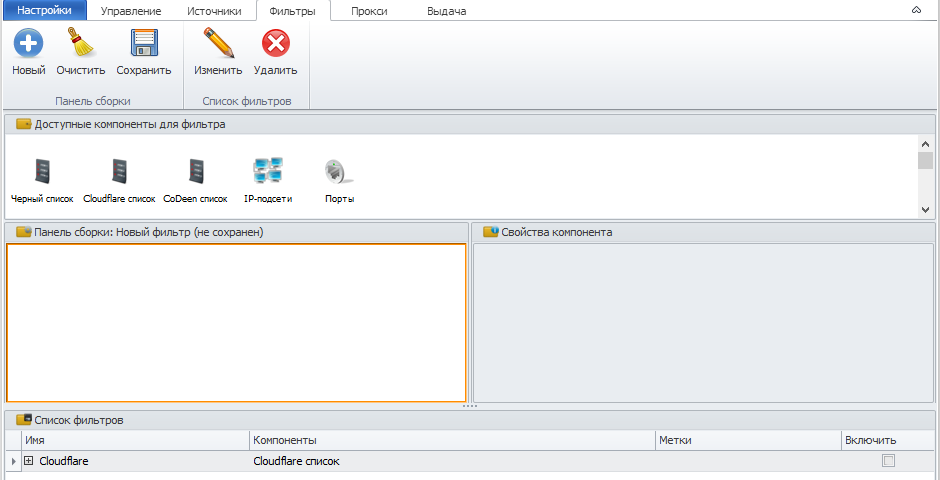
Filter Components
Blacklist — filters proxies according to the built-in blacklist. Proxies from the blacklist will not be loaded into the program’s database.
Cloudflare list — filters proxies according to the Cloudflare list.
CoDeen list — filters proxies according to the built-in CoDeen/Planetlab list. Proxies from the CoDeen list will not be loaded into the program.
IP subnets — filtering by IP address ranges. Sets restrictions on allowed proxy IP addresses using a list of subnets.
Ports — filtering by port number or port range. Sets restrictions on proxy ports.
Creating a Filter
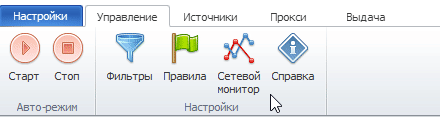
To create a filter, enable the Filters option on the Management tab:
Go to the Filters tab and create a new filter. Drag the required filter components to the Assembly Panel and configure their properties. Then save the filter. After that, it will appear in the list.
The mechanism for adding and configuring filters is the same as for Rules; you can read more in this article.
Enabling a Filter
To apply a filter, you need to enable it. To enable it, check the box to the right of the rule.
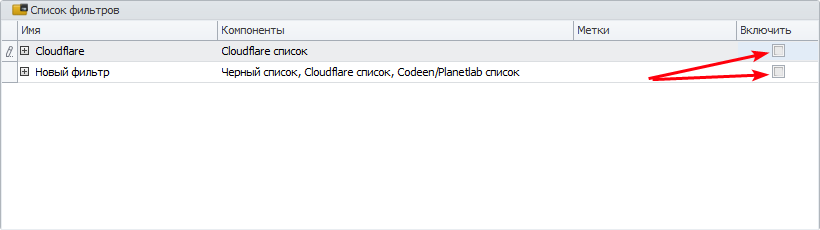
The program will then calculate how many proxies in the database do not meet the filter conditions and will prompt you to confirm enabling this filter.
You can also modify or delete the filter using the corresponding buttons in the menu.